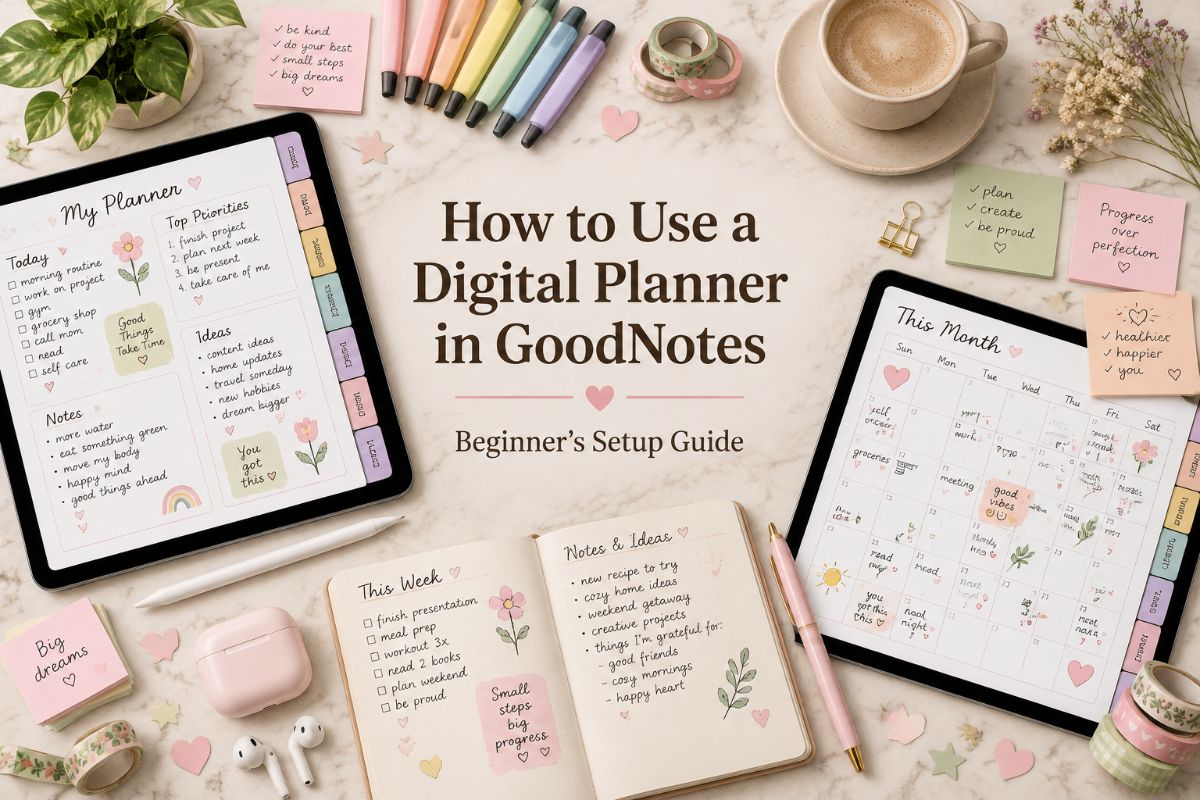
How to Use a Digital Planner in GoodNotes: Set It Up in 6 Steps Without the Confusion
A digital planner in GoodNotes gives you the feel of a paper planner with tabs that jump to any page, stickers you can move around, and pages you can copy as often as you like. The first setup can feel confusing, especially if you have never imported a PDF into the app.
This guide walks you through the whole process in six steps, from saving the file to adding stickers and copying pages. You will also find a simple daily routine, fixes for the most common problems, and two planners that make a good starting point.
Quick navigation
Table of Contents
What You Need to Get Started
Setting up a digital planner in GoodNotes takes about fifteen minutes, and you only do it once. Before you begin, have these ready:
- A tablet. An iPad is the most common choice, and GoodNotes also runs on Android and Windows devices.
- The GoodNotes app, installed and opened at least once.
- A stylus. An Apple Pencil or another stylus gives you neater handwriting in small boxes, but you can write with a finger too.
- Your planner file. Most digital planners come as a PDF, sometimes inside a .zip folder.
Dated or Undated: Which Planner Should You Open First?
The type of planner decides how much setup you have in front of you.
- Dated planners already have every weekday and month filled in. You import the file and start writing.
- Undated planners leave the calendar pages open. You write the dates in yourself, and you can begin in any month and reuse the file next year.
If you like a finished look, choose a dated planner. If you want a planner you can restart whenever you like, choose an undated one. Our roundup of the best digital planners has both types.
How to Set Up a Digital Planner in GoodNotes in 6 Steps
The steps below work for any hyperlinked planner PDF. Menu names can change a little when GoodNotes updates, so look for the same words if a button has moved.
Step 1: Save the Planner File to Your Tablet
Start by moving the planner file somewhere you can find it. If it arrived in a .zip folder, unzip it in your Files app first and look inside for the PDF. Some bundles include extra folders with stickers, covers, and instructions, so keep the folder together until you have checked what is inside.
Step 2: Import the PDF into GoodNotes
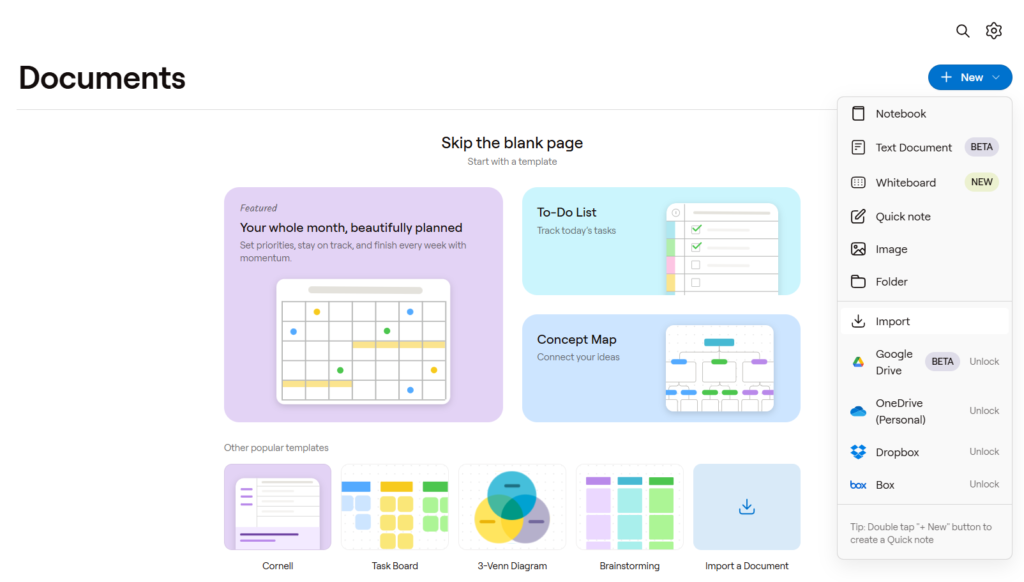
Open GoodNotes and go to the Documents tab. Tap the + New icon, choose Import, select your planner PDF, and open it. You can also open the file in the Files app, tap Share, and choose Open in Goodnotes, then pick where to save it.
A planner usually lands in your library as one notebook with hundreds of pages. If the file is large, give it a moment to finish loading before you start tapping.
Step 3: Test the Tabs and Links
The tabs and buttons are what make a hyperlinked planner fast to use, so try them before you write anything. Tap a month, a section tab, and the home button, and check that each one jumps to the right page. In GoodNotes, links in an imported PDF open when you switch to Read-only mode and tap the link, or when you touch and hold the link and choose Open Link.
Working links depend on the PDF itself. If a link does not open in GoodNotes, you can test the same file in another PDF viewer to see whether the link exists in the file.
Step 4: Try Your Pen and Highlighter on a Notes Page
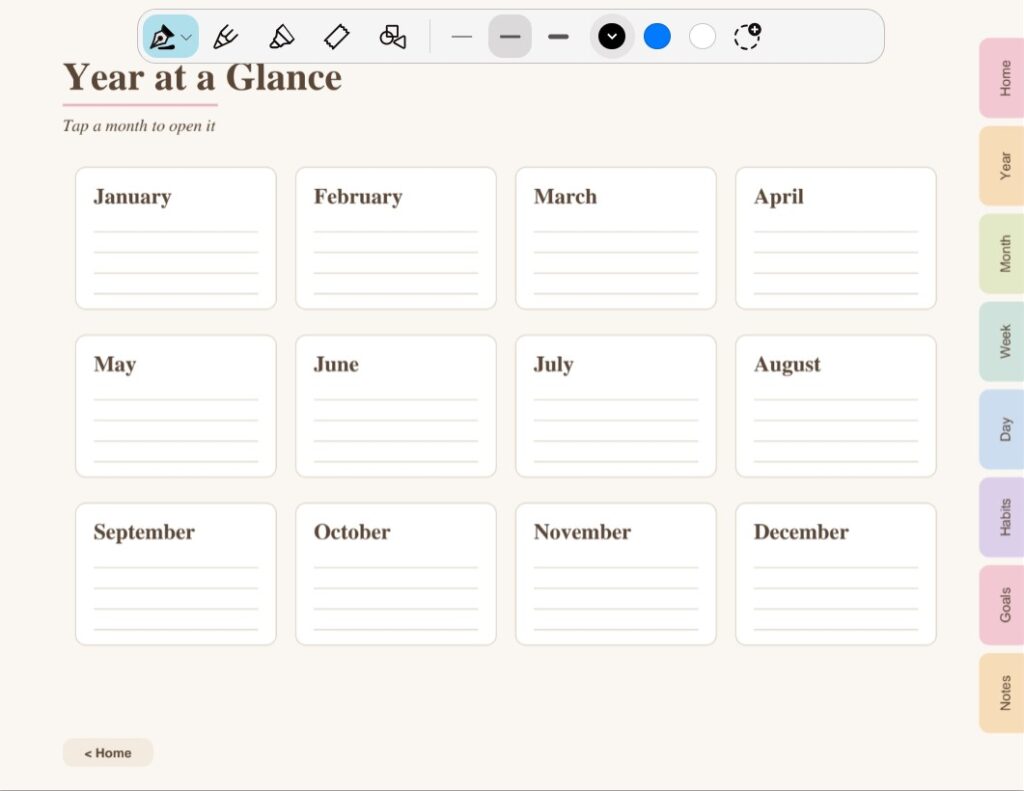
Before you fill in a daily page, practice on a notes page. Choose a fine pen so your writing fits in the small boxes, and pick a highlighter for dates and deadlines. Two or three colors are enough: one for tasks, one for appointments, and one for things you want to stand out. A digital planner in GoodNotes feels much more natural once your pen settings are right.
Step 5: Add Stickers and a Cover
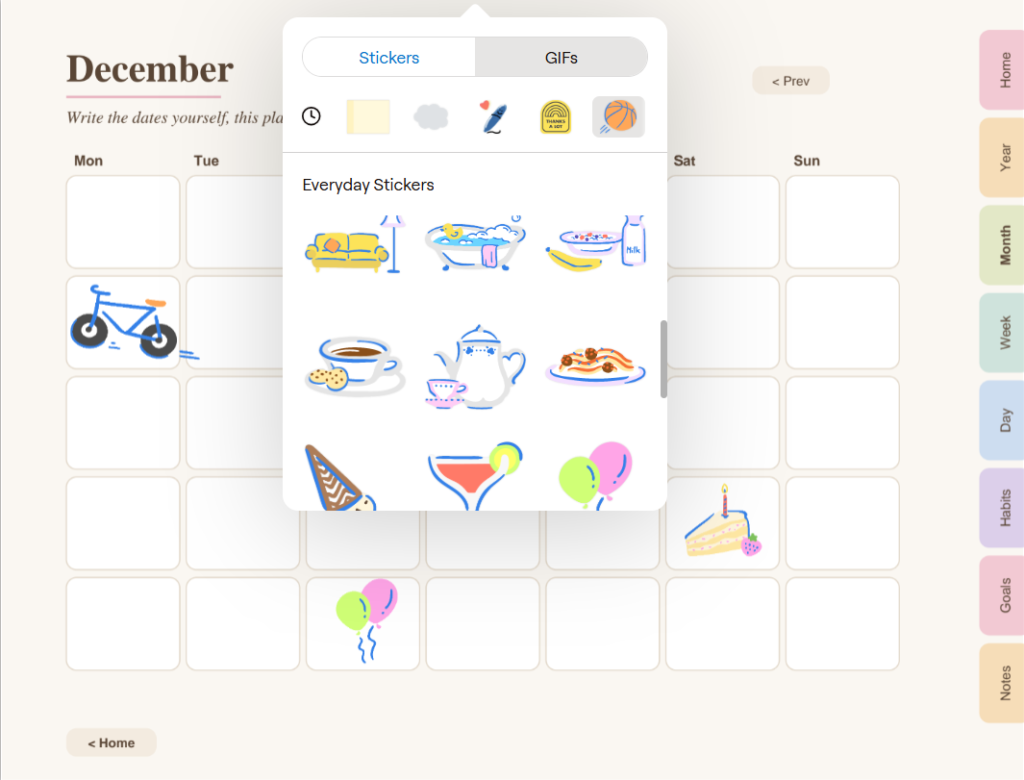
Stickers are the fun part of a digital planner in GoodNotes. Select the Elements tool on the toolbar, choose Stickers, and tap one to place it on the page. To use your own stickers from a planner bundle, scroll to the end of the collection list in Elements, tap the plus icon, give the collection a title, and choose Add Photos or Import from….
To change the cover, open the planner, tap Add Page, choose Import, and select the cover file. Move it to the front, then remove the old cover page from the page list in the Sidebar.
Step 6: Copy the Pages You Need
Undated planners often give you one weekly or daily page as a template, and you copy it as many times as your year needs. In GoodNotes, open the Sidebar and tap Select Pages, choose the pages, and tap Copy. Then tap the Add Page icon, choose Before, After, or Last Page, and tap Paste Page(s).
Copy only a few weeks at a time. A smaller file opens faster and is easier to move through.
If Your Planner Is a Canva Template
Some planners are sold as Canva templates instead of ready PDFs. You can still use them as a digital planner in GoodNotes with a few extra steps:
- Open the template link from your files and edit it in Canva: change the dates, colors, and text.
- In Canva, open the Share menu, choose the PDF file type, and save the result to your tablet.
- Import that PDF into GoodNotes with the steps above.
Keep in mind that links and tabs only work if the template includes them, so check the listing before you buy if you want a hyperlinked planner.
How to Use Your Digital Planner Every Day
A digital planner in GoodNotes only works if you open it daily. A short routine is easier to keep than a long one:
- Morning, 5 minutes. Open today’s page, write your top three tasks, and block out any appointments.
- Evening, 5 minutes. Tick off what you finished and move leftovers to tomorrow.
- Sunday, 10 minutes. Look at the week ahead on your weekly page and note one goal for each day.
Keep the planner as the first document in GoodNotes, so your digital planner in GoodNotes is the first thing you see when you open the app.
Common Problems and Quick Fixes
- The links don’t open. Switch to Read-only mode and tap the link, or touch and hold it and choose Open Link. If it still fails, test the file in another PDF viewer. If the link fails there too, the file has no working link, and the seller can help.
- The planner is slow. Large planners with hundreds of pages need more memory. Close other apps, and make sure you only copy the pages you need.
- The writing space is too small. Zoom in on the page while you write, or choose a planner whose page size matches your screen.
- The pages look blank or stretched. Import the original PDF again instead of an exported copy.
Which Digital Planner Should You Start With?
You can follow every step above with a free practice PDF, but a planner with ready-made tabs makes the setup much easier. Here are two layouts that match this guide, one dated and one undated:
ALL-IN-ONE 2027 SYSTEM
All-in-One Digital Planner 2027
This 2027 planner runs the whole year from a single interactive PDF, with clickable navigation that takes you from the yearly overview to any month, week, or day. Daily pages include a schedule with time blocking and top priorities, while weekly pages add budget, meal, and cleaning sections.
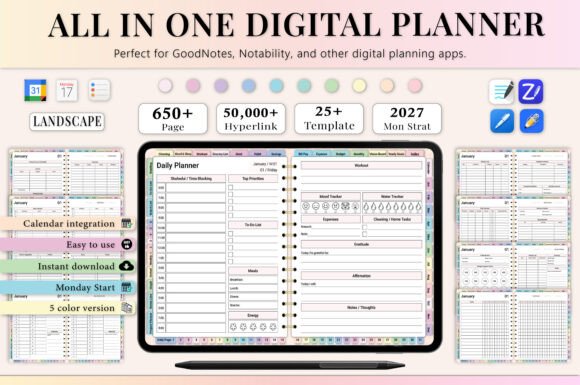
Pages: 655 | Year: 2027 | Format: Hyperlinked PDF | Apps: GoodNotes, Notability, Noteshelf, Xodo, Penly, ZoomNotes, Samsung Notes
Best for: anyone who wants money, meals, workouts, and daily tasks in one tablet planner instead of juggling several apps. It fits Steps 2 and 3 of this guide: after you import the file, the first thing to try is its clickable navigation.
- Yearly pages: year at a glance, important holidays, yearly goals, and a vision board
- Monthly pages with calendar, budget, expense and bill trackers, habit, mood, and sleep trackers
- Daily gratitude journal, affirmations, water tracker, and expense tracking
- Finance pages with a savings challenge and a financial summary
- Premium note templates
Budgeting, wellness, and household routines sit right beside the calendar, so you don’t need a separate budget or habit app. The listing notes that a paid GoodNotes account may be needed to open large planners smoothly, so check your app plan first. Choose this one if you want a single system for the whole year; skip it if you prefer a short, light planner.
BEST UNDATED OPTION
Undated Digital Planner, Horizontal
This undated planner lets you begin in any month and keep using the same file, so a late start never leaves you with empty weeks. Hyperlinked daily, weekly, and monthly pages make navigation quick, and each of the 12 months is its own module. The horizontal layout suits a tablet used in landscape.
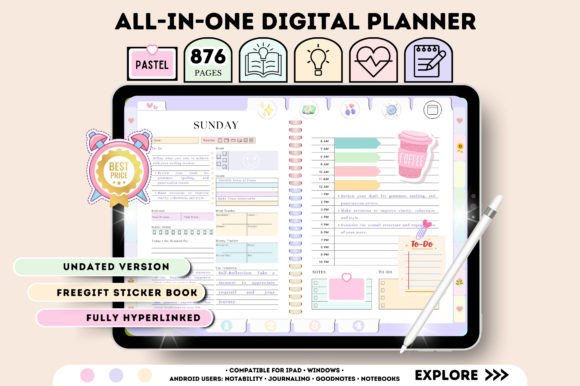
Orientation: Horizontal, 11 × 8.3 in | Dating: Undated | Layout: 12 individual monthly modules | Apps: GoodNotes, Notability, Noteshelf, Xodo, Samsung Notes
Best for: anyone who wants to start on any day and reuse the same planner, without wasted pages. It fits Step 6 of this guide, because the undated monthly modules are made to be copied and reused.
- Health and fitness: fitness log, period tracker, self-care tracker, blood sugar and blood pressure logs, mood, habit, and water trackers
- Productivity: goal planner, vision board, to-do list, wish list, bucket list, reading log, and TV tracker
- Finance: annual overview, monthly budget, and expense, saving, bill, debt, and spending trackers
- A free five-page sticker book and instructions
Because there are no dates to fill in, you can reuse the file whenever you like. It works in GoodNotes, Notability, Noteshelf, Xodo, Samsung Notes, and other PDF editing apps. Choose this one if you want a long-lasting planner with health and money pages; skip it if you’d rather have your dates pre-filled.
Want more options, from simple layouts to ADHD and budget planners? See our full list of digital planners, grouped by style and purpose.
FAQ
Do I need an Apple Pencil to use a digital planner in GoodNotes?
No. An Apple Pencil is a popular choice because it feels natural and keeps handwriting neat in small boxes, but any compatible stylus works, and you can also write with a finger. A stylus is more precise, so it is worth trying one if you plan to write a lot.
Can I use GoodNotes on an Android tablet or a Windows laptop?
Yes. GoodNotes can import files on iOS, Android, Windows, and the web, so you are not limited to an iPad. Check each planner listing to see which apps and devices are supported.
How many notebooks can I edit in GoodNotes for free?
According to the GoodNotes help center, free users can edit up to three notebooks and can still view the rest. A planner is usually one notebook, so a free account can be enough to get started. Plan details can change, so check the app for current limits before you set up a digital planner in GoodNotes.
Can I use the same planner in Notability or another app?
Often yes. Most hyperlinked planners are PDFs that work in annotation apps such as Notability, Noteshelf, Xodo, or Samsung Notes as well as GoodNotes. The listing names the supported apps.
Can I print a planner that I use in GoodNotes?
It depends on the planner. The links only work on screen, and some planners say they are not designed for printing, while others can also be printed. Read the listing details before you buy.
Are digital planners worth it?
They are worth it if you like writing by hand but also want tabs that jump to any page, pages you can copy, and one device for everything. If you prefer paper or rarely carry a tablet, a printed planner may suit you better. The routine matters more than the format.
Ready to pick a planner? Browse our list of the best GoodNotes planners, with 22 hyperlinked and undated options, or get inspired by these digital planner ideas.
Final Thoughts
A digital planner in GoodNotes is simple once you have set it up: import the PDF, test the tabs, add your stickers, copy the pages you need, and open it every day. Start with one notebook and a short morning and evening routine, and add extras only when you want them. The best setup is the one you will still use in month three.
This post contains affiliate links. If you buy through them, we may earn a small commission at no extra cost to you. Learn more.